
The Luggage from Discworld is a beloved character. Much like most Discworld characters, there are a huge number to draw from.
Creating the Luggage in Blender 3D
The first step of this project was to actually create the model. I wanted to get better at predicting printable pieces, and though this would be a great character to start with because of the relatively basic design. Essentially just a box with a rounded lid, I thought my fledgling 3D printing skills might be able to handle this one.
My friends’ favourite Discworld character is Death, but I think that may be everyone’s favourite. So, look out for a Death model soon. Or possibly Errol, as apparently that is more at my skill level 🧐.
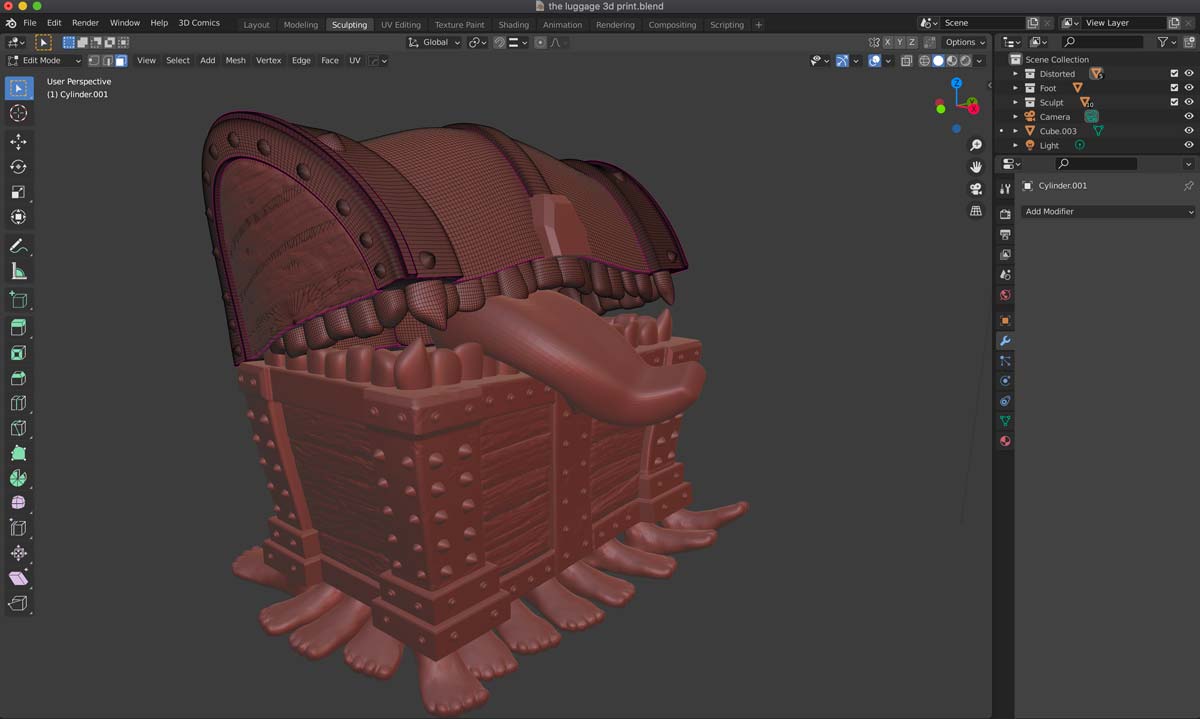
As you can see from the image above, I modelled much of the geometry from basic shapes, added deformations to give it a more stylised look, and sculpted details such as wood grain, dents, and scratches. It is by no means “perfect”, and the description does say “hundreds of legs/feet”, but that just means there is room for improvement in version 2.0 😅
Preparing to Print in Blender.
One issue I’ve found with resin 3D printing in Blender is that, though it is easy enough to print a solid piece, it’s much harder to print a hollow one. So far, I have been slicing the files with Chitubox, Lychee, and the Anycubic workshop, but none of them have figured out how to hollow an object made of many pieces. I get it, I wish they had a magic ‘join’ button or something.
The easiest way I have found to hollow the print is to combine the meshes with a Boolean operation, or to remesh the whole piece into a single, watertight geometry. Once it’s a single piece, most slicers have no problem hollowing it out, so you can save on resin 👌.
Preparing The Luggage STL
After the model is ready, I export the STL from Blender and take it into the slicing software.
Now, I should say that I am still pretty new to the whole STL thing, and this is really my second design and print; the first one I haven’t really publicised yet because I am still working on the perfect print (and it’s very hard to hollow). So this print is a “failure”, or at least there were some failings. The feet on the front and back didn’t print properly, and there was a slight issue with the teeth on the left side (as you look at it). But this could be solved with a bit more time spent on the supports… Damn my impatience.
Soooo, a few people have asked me if I will make the STL available, and right now, I really don’t know. There are hurdles like copyright and making sure the print would work 100%. I’m still trying to figure out how people are giving away Marvel characters on their Patreon. Anyway, we will see. It would be nice to generate more income from 3D or STL models so I can devote more time to them.
Prepping and Painting
I’m lazy, so I literally just pulled the supports off and put the model in my wash-and-cure machine (who has time to sand?). If the print had come out perfect, maybe I would have spent more time on prep, but I just wanted to see what it would look like painted.
The paints I use are Games Workshop paints. I just used a base coat for a dark bronze look, a topcoat dry-brushed to pick out some highlights, and then a dark wash that fills the cracks and crevices to give it a fake ambient occlusion or ageing effect. This is a technique I use quite often because it gives a nice finish for very little time spent on it – probably about half an hour max.


it’s very well done. Can you send me the STL so i can make one?
Best regards,
Rui Nogueira
It’s not 100% yet, as there have been a few printing errors I want to fix. But one day I’ll have an STL ready for prime time.
did you ever get the STL sorted, as this looks fab.
No, I’m afraid not. After a house move and generally being too busy to think, I have not retuned to the project in a while. Mainly because since the move I haven’t been able to set up the printer to test the file and improve it. Sorry.